Google Cloud Platform - IaC Deployment (Recommended)
This guide walks you through connecting your GCP environment to Praetorian Guard Platform (PGP) for comprehensive security monitoring and management using Infrastructure as Code (IaC) deployment methods. The integration leverages GCP's Workload Identity Federation and IAM roles to provide PGP with the necessary permissions to assess your GCP resources while maintaining security best practices.
You can choose between Organization-level integration (recommended for full GCP environment coverage) or Project-level integration (for specific Project monitoring). The process involves creating service accounts, configuring Workload Identity Pools, and setting up the appropriate IAM bindings through automated Terraform deployment.
Prerequisites
Before starting the integration, ensure you have:
GCP Console access with sufficient permissions to create Projects, service accounts, and Workload Identity Pools
Organization administrator permissions (for Organization-level integration)
Project editor/owner permissions (for Project-level integration)
Billing account access (for creating new Projects in Organization-level integration)
Terraform (v1.13.5 or above)
Integration Process
Step 1: Initiate Integration Setup
Navigate to the Integrations section in your PGP dashboard
Click "Add Integration" and select "GCP"
Choose your integration scope and provide the required information
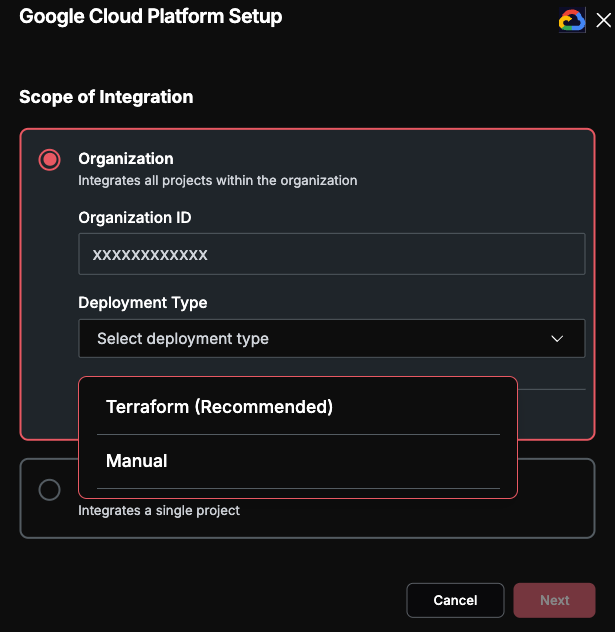
Organization-Level Integration (Recommended)
For Organization-level integration, you'll need to provide:
Organization ID: Your GCP Organization ID (numeric value)
Deployment Type: Choose from Terraform or Manual
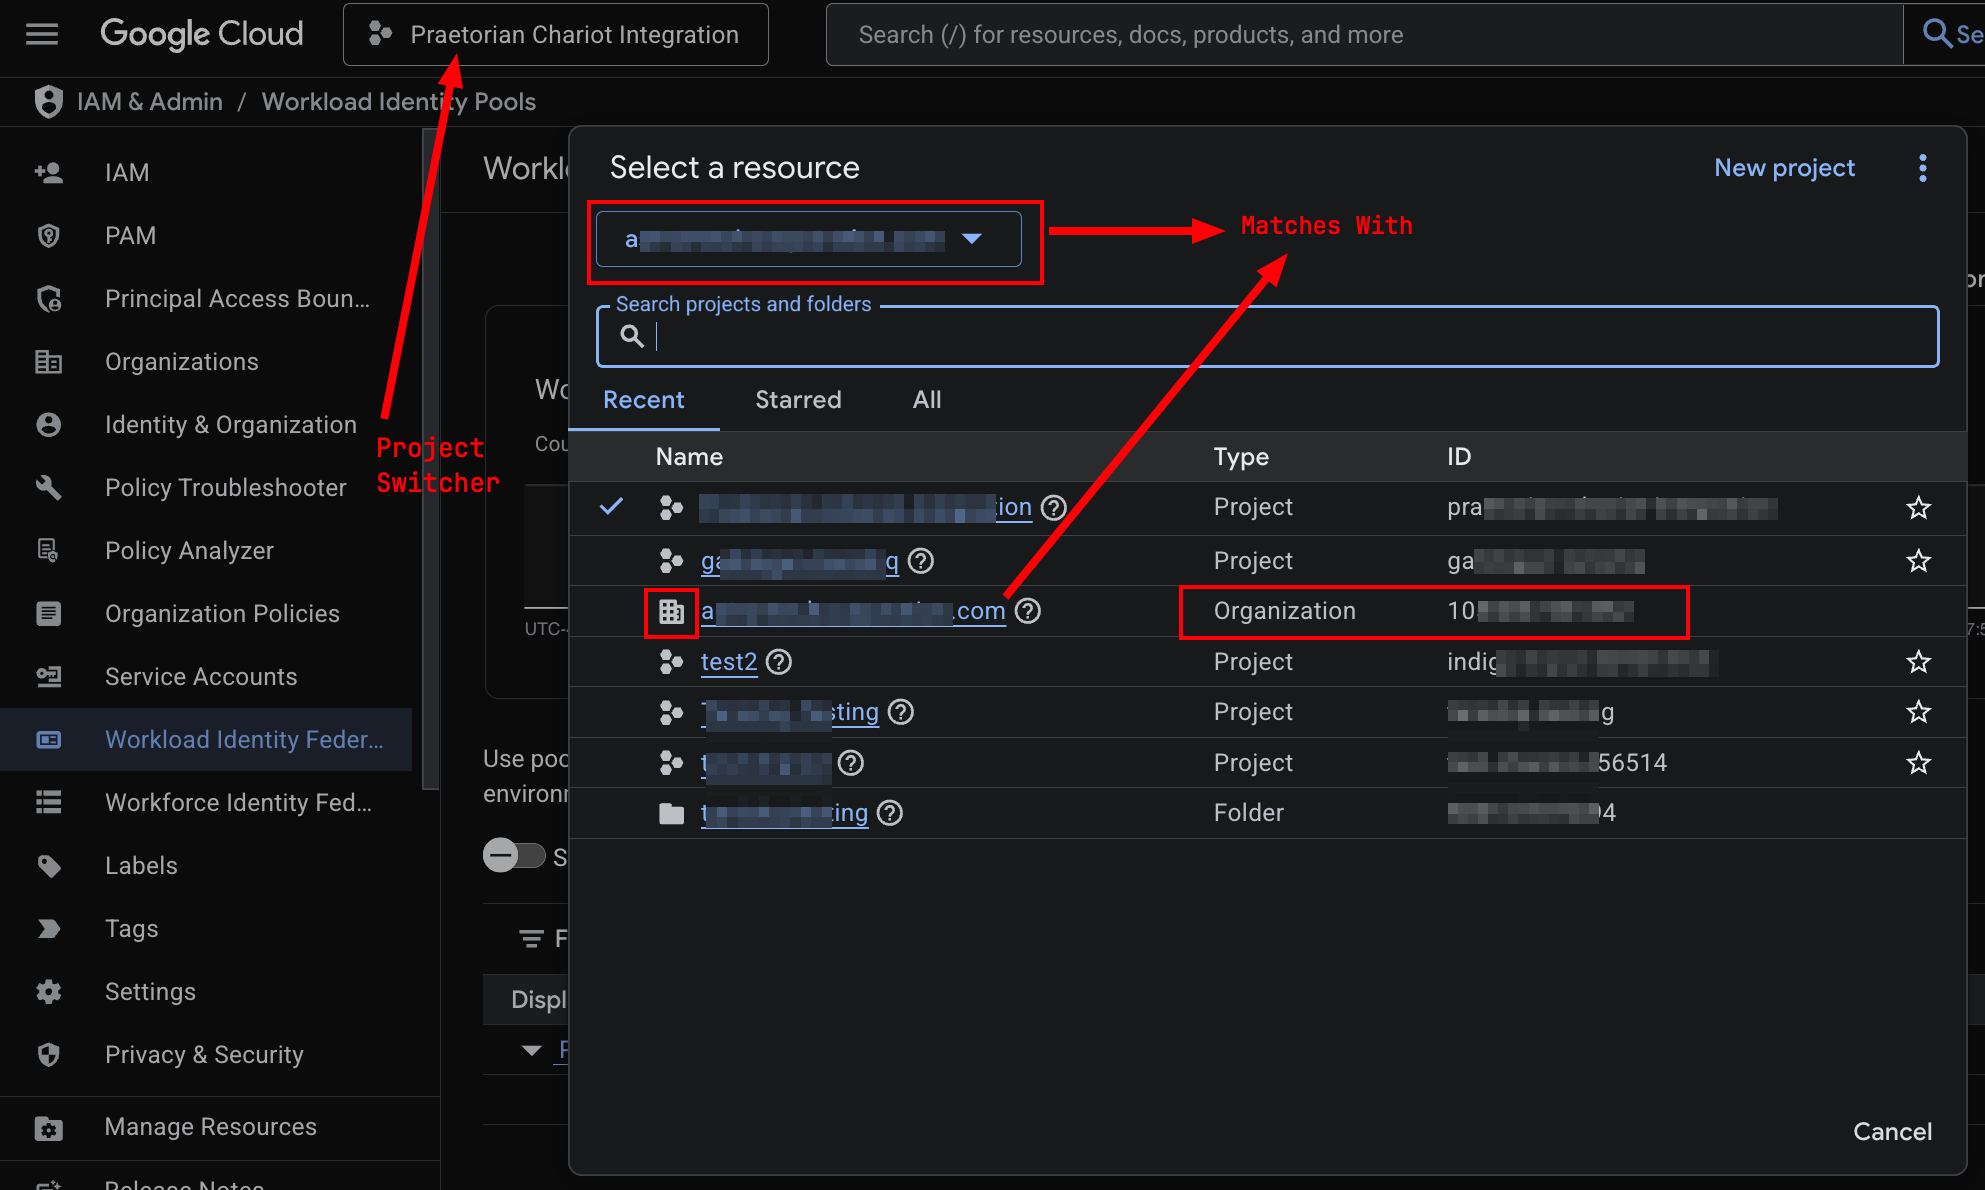
TIP: To get your Organization ID, view the Project switcher in the Google Cloud Console. You can also search for your Organization name.
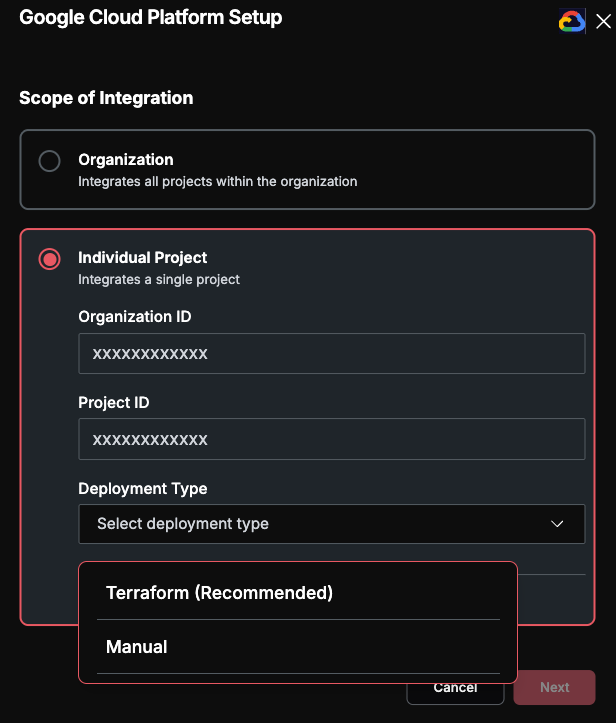
Project-Level Integration
For Project-level integration, you'll need to provide:
Organization ID: Your GCP Organization ID (numeric value)
Project ID: The specific GCP Project ID you want to integrate
Deployment Type: Choose from Terraform or Manual
Step 2: Download Integration Template
After providing your Project information, PGP will generate the appropriate deployment template. This template is generated dynamically based on the information you provided.
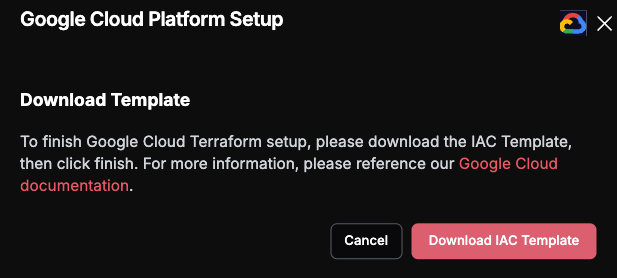
Click "Download IAC Template" to download the deployment files
The template contains all necessary service accounts, Workload Identity Pool, and IAM bindings pre-configured with your unique subject ID
On submission, the next step will ask for an "Infrastructure ID", which you will get after completing the infrastructure deployment

Step 3: Deploy the Template
Perform the necessary tasks based on the deployment task you chose above. Please make sure to complete this deployment successfully before completing the integration.
Terraform Deployment (Recommended)
Open Google Cloud Shell from your GCP administrator account, or if you want to run
terraformlocally, authenticate to GCP withgcloud, with the following commandsAuthenticate as the administrator user:
gcloud auth loginSet application default credentials:
gcloud auth application-default login
Ensure that the credentials you signed up with possess global administrator privileges (i.e., at the Organization scope)
If you're integrating your GCP Organization, it's beneficial to unset your local Project:
gcloud config unset projectIf you're integrating a single Project, set CLI to use that Project:
gcloud config set project YOUR_PROJECT_IDCreate a new directory, initialize Terraform, and create a plan:
mkdir chariot-deployment && cd chariot-deployment(Chariot is the old name of PGP and still exists in some automated workflows)
Upload the template from previous step to this directory
terraform init && terraform planReview the planned changes and save to a file if necessary. Once satisfied, apply the changes and monitor for deployment errors:
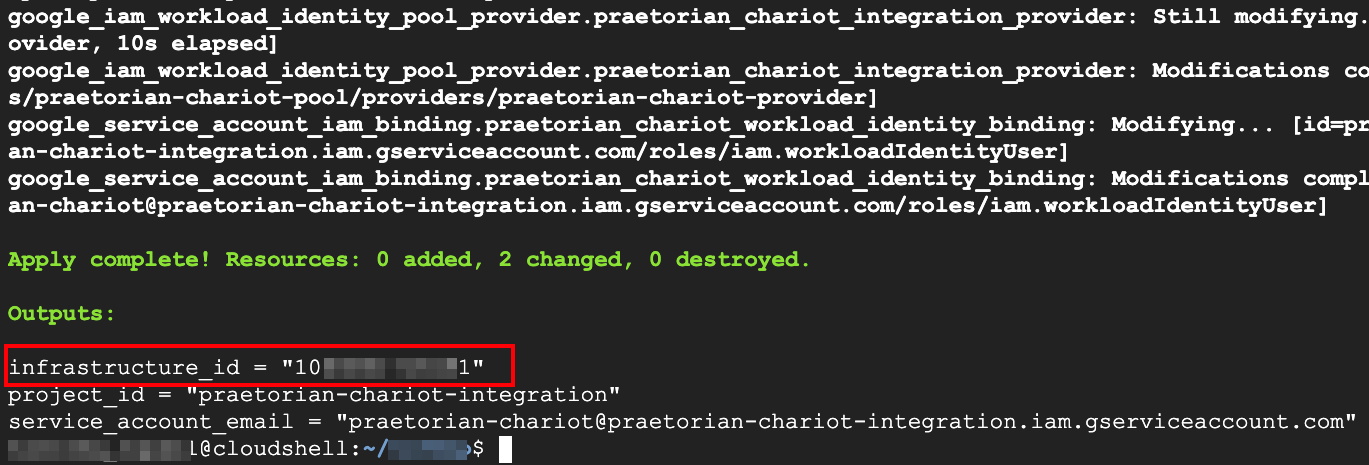
terraform applyEnsure there are no errors during deployment, then observe the output at the end of the execution output. The deployment will produce an infrastructure ID, which you need to provide back to PGP.
Under the hood, the terraform template performs a number of actions. More specifically, for the Organization-level integration, the template will:
Create a new Project named praetorian-chariot-integration
Create a service account for Chariot integration
Grant Organization-level permissions to the service account
Set up a Workload Identity Pool and Provider
Configure federated identity credentials to trust PGP's identity pool with a strict subject match for your associated user in PGP
For a Project integration, the template will perform similar actions:
Create a service account for PGP integration
Grant Project-level and required but limited Organization-level permissions via a custom role
Set up Workload Identity Pool and Provider in your [same] Project
Configure federated identity credentials to trust PGP's identity pool with a strict subject match for your associated user in PGP
Step 4: Complete Integration
After deploying the template or completing manual setup, return to the PGP integration modal
Enter the Infrastructure ID value provided as an output of your deployment
Click "Finish" to complete the integration
PGP will automatically:
Validate the integration by authenticating with Cognito
Perform OIDC token exchange with your Workload Identity Provider
verify validity of access using a simple GCP API call
Add the integration to your integrations list upon successful validation
Next Steps
Once your GCP integration is successfully validated and appears in your integrations list, PGP will begin monitoring your GCP environment. The system will automatically discover and assess your GCP resources, providing security insights and recommendations through your PGP dashboard.
Need Help?
If you encounter any issues during the integration process or have questions about configuring your GCP integration, please contact our support team at support@praetorian.com. Include your Infrastructure ID and any error messages you've encountered to help us assist you more effectively.