Account Creation and Attack Surface Setup
Welcome to the Praetorian Guard Platform (PGP)!
This page offers step-by-step instructions to sign up and get started in PGP.
Getting Access to PGP
Important: PGP operates on an invitation-only basis. You cannot create a free account independently - you must be invited by an existing PGP organization to gain access.
Receiving an Invitation
When an existing PGP user invites you to their organization, you will receive a "Welcome to the Praetorian Guard Platform (PGP)!" email from guard-noreply@praetorian.com. This email contains:
• A personalized signup link for creating your account
• Information about the organization that invited you
• Instructions for completing your registration
Creating Your Account
Critical Email Requirement: You must use the exact same email address (case-sensitive) that was used when you were invited as a collaborator. Email addresses like "user@example.com" and "User@example.com" are treated as different addresses.
1. Click the signup link in your invitation email
2. You'll be taken to the registration page
3. Enter the exact email address that received the invitation
4. Create a secure password for your account
5. Complete any additional required information

Email Verification
After creating your account, you'll receive a verification code via email to confirm your address:
1. Check your email for a verification code from guard-noreply@praetorian.com
2. The email subject will be "Your verification code"
3. Enter the code when prompted to complete your registration
Accessing the Guard Platform
Once your account is verified, you can sign in at https://guard.praetorian.com/login using:
• Email and password
• Single Sign-On (SSO) if configured by your organization
• Google authentication if enabled

Multi-Factor Authentication
First Login: When you log in to PGP for the first time (and SSO is not enabled), you will be required to set up MFA. The setup process will begin automatically and you must complete it to access your account.
Follow the On-Screen Instructions: PGP will display a QR code and a manual setup key. Open your authenticator app, scan the QR code (or enter the key), and enter the 6-digit code generated by your app to verify.
Save Recovery Codes: After successful setup, you will receive recovery codes. Save these codes securely—they are required if you lose access to your authenticator device.
Access Granted: Once MFA is configured, you will be able to use PGP. You will be prompted for a 6-digit code from your authenticator app each time you log in.
After setting up MFA, you will be prompted for a 6-digit code from your authenticator app each time you log in.
Enter the code to complete the login process.
Automatic Organization Access
When you sign in to PGP after being invited as a collaborator, the system automatically places you into the organization that invited you. You will immediately have access to that organization's security data and assets without needing to manually switch accounts.
Multiple Organization Access: If you are a collaborator in multiple organizations, you can navigate between them by clicking the account icon in the top right corner and selecting Tenant Management from the dropdown menu.

This marks the beginning of your PGP journey!
Seeds
To start PGP scans, navigate to the Seeds page by clicking Seeds on the navigation bar on the left side of the screen.

In PGP, a seed is a persistent digital asset owned by your organization. You can input network assets, web applications, or web services as seeds.
top level domains, fully qualified domain names, CIDR ranges, or IP addresses. These should be stable resources. In other words, an ephemeral IP address managed by a cloud service would not be a good addition as a seed. The domain that IP is tied to, would be a good addition as a seed.
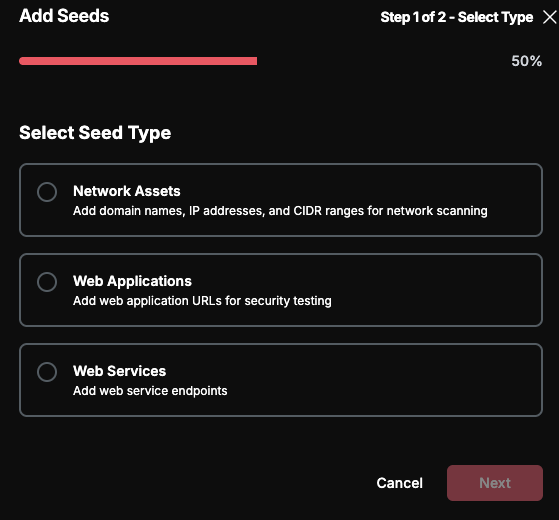
On the actions bar of the Seeds table, there is an Add Seed button. Click the Add Seed button.
Here you can enter individual seeds or import a list of seeds.
Assets
After you've added your root domain and other seeds, click Assets on the navigation bar on the left side of the screen.
The Assets page is where you can see your full attack surface in PGP.

You can click on any asset to see more information. Each asset will show comprehensive information.

Technologies
Navigate to the Technologies using the left navigation bar.
Here you will see a comprehensive list of the technologies that PGP has identified within your attack surface.

Vulnerabilities
Navigate the to the Vulnerabilities page using the left navigation bar.
Here, you will see a comprehensive list of all the vulnerabilities PGP has found and the asset they were found on.

Integrations
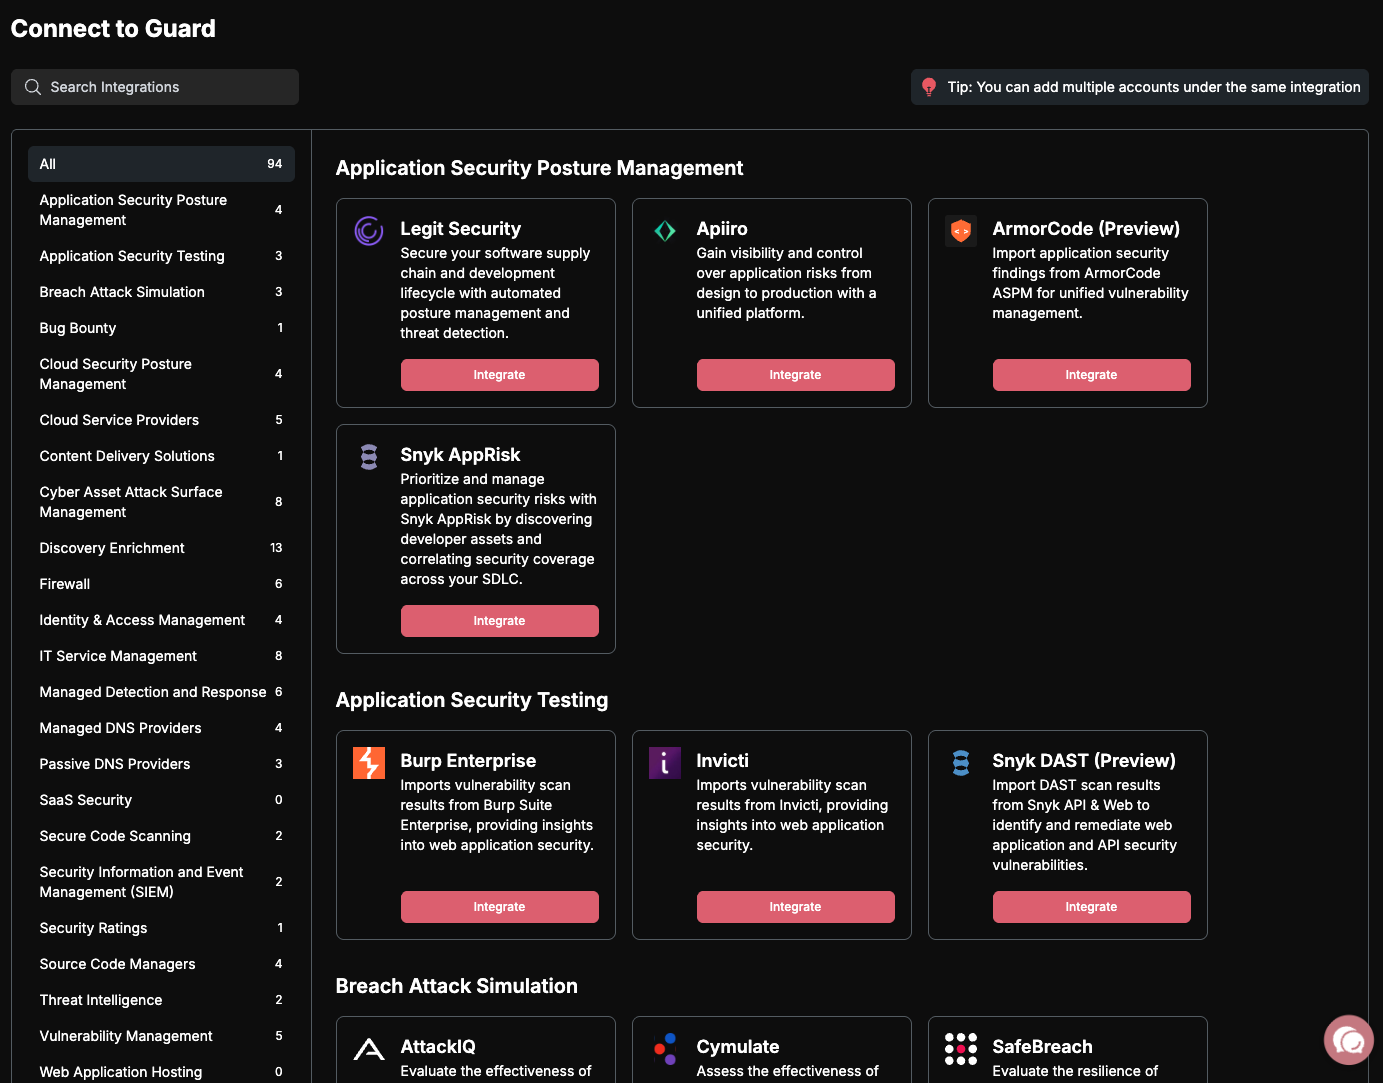
To get the most from PGP, we recommend integrating with your existing service providers. PGP offers a wide variety of integrations. You can look for integrations by category or by searching directly for an intended integration.
From the Integrations page, you can connect PGP and your existing services.
Whether you add additional services or not, PGP will find and add assets related to the seeds you provided.
Settings
The Settings page provides comprehensive control over your PGP account configuration, notifications, security features, and appearance preferences.

On the Settings page, you can manage:
-Scan Settings; Configure how Guard scans your attack surface.
- Notifications; Configure alerts through external integration channels. Set up Exposure Alerts to monitor externally exposed ports and services. Note that Notifications must be configured before adding Exposure Alerts.
- Organization Details; View and edit your organization name and contact email or set up SSO.
- User Management; Control and see details about who has access to your account.
-Access Logs; View who is logging into the account and when.
- Asset Monitoring; Visualize complete counts of the assets that Guard is tracking in your account.
- Annual Subscription; Get details about what your subscription to Guard covers.
Congratulations
You have successfully set up PGP - congratulations! You can now review the remaining documentation to take full advantage of the PGP platform.