Aegis V2 Installation
How to install, enroll, and manage Aegis V2 endpoints from the web UI and the CLI.
Aegis V2 is the current endpoint agent. Aegis V1 is deprecated. Use V2 for new deployments. V1 installers (Windows, MSI, DEB, RPM, OVA) do not install V2.
Open Endpoints, then Set Up Endpoint (empty table) or Add Endpoint (when rows exist). The dialog title is Aegis Installation. It is a three-step wizard: Requirements → Install → Enroll. Enrollment controls require manage_endpoints.
Requirements
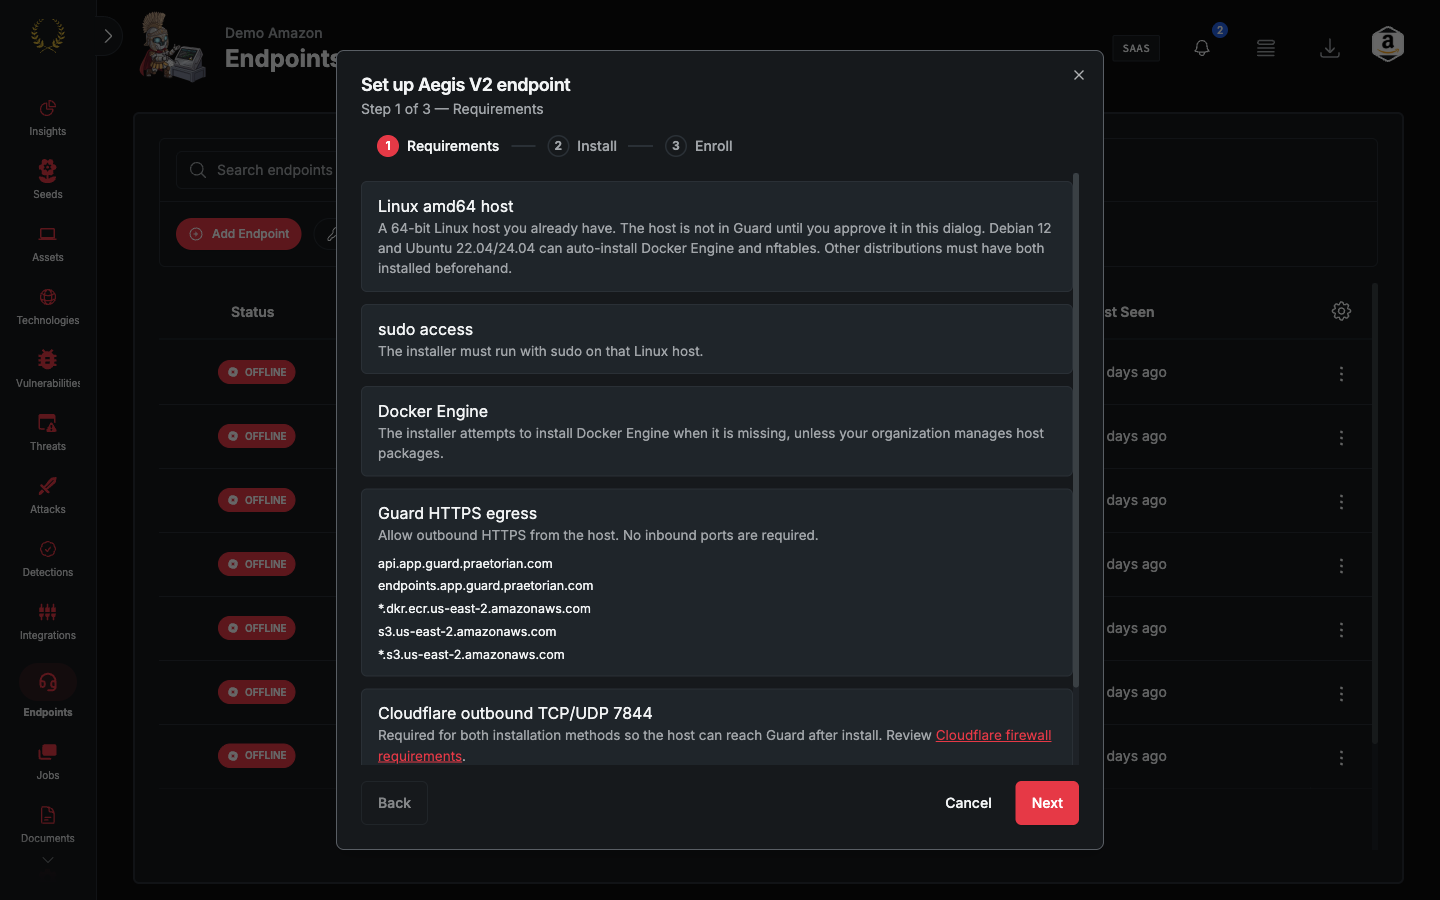
Step 1 of 3 lists what the host must provide:
- Linux amd64 host — A 64-bit Linux host you already have. The host is not in Guard until you approve it in this dialog. Debian 12 and Ubuntu 22.04/24.04 can auto-install Docker Engine and nftables. Other distributions must have both installed beforehand.
- sudo access — The installer must run with sudo on that Linux host.
- Docker Engine — The installer attempts to install Docker Engine when it is missing, unless your organization manages host packages.
- Guard HTTPS egress — Allow outbound HTTPS from the host. No inbound ports. Guard lists the environment domains here.
- Cloudflare outbound TCP/UDP 7844 — Required so the host can reach Guard after install. Review Cloudflare firewall requirements.
Optional: My organization manages host packages — appends --no-install-dependencies to the install command.
Windows, macOS, Docker Desktop, rootless Docker, and arm64 are not supported.
Click Next.
Install
Step 2 of 3 offers two methods. Clicking a method mints a short-lived tenant kit (pinned agent, launcher, checksums, enrollment config). Do not paste signed URLs into tickets or chat. Generate a fresh kit if it expires (Guard remints when the signed URL is expired or within 60 seconds of expiry).
Install with curl — Run the command Guard shows on the Linux host (curl the kit, extract, then sudo ./aegis-agent_linux_amd64 install --config ./aegis-agent-install.json). Copy keeps && between lines.
Download and transfer — Download the kit in the browser, copy it to the Linux host, then extract and run the same install command there.
If minting the kit fails, Retry sits in the error callout. Method cards stay visible.
Leave the installer running when it shows the short enrollment code.
Click Next.
Enroll
Step 3 of 3: enter the eight-character enrollment code. Inspect tenant, endpoint identity, expiry, and reported host details with the person on the host. Hostname, OS, architecture, and version are reported by the installer, not independently verified.
Approval installs identity; it does not prove connectivity. The endpoint stays Offline until the daemon heartbeats. The installer then starts aegis-agent.service, waits up to 90 seconds for an acknowledged heartbeat, and only then enables the service at boot. Heartbeat failure stops the service and fails install.
If Guard shows Approval not confirmed, check the host before starting another enrollment — approval may have succeeded.
Rerunning the installer on the same account does not require a second approval. It rejects an account mismatch or expired identity.
Approving enrollment from the CLI
The praetorian-cli package installs the guard command. When the installer on the Linux host displays the user code, run:
guard aegis enrollment approve <code>
The command fetches and displays the pending enrollment details — endpoint ID, hostname, OS, architecture, and expiry — then prompts for confirmation before submitting approval. Review these details with the person on the host before confirming, exactly as you would in the web wizard.
The same account-boundary and expiry rules apply: the user code must belong to the authenticated tenant, and an expired code is rejected.
After install
The endpoint appears on Endpoints. Empty state: No Aegis Endpoints Found. Drawer tabs: Overview and Health. Network Policy appears for users who can manage endpoints. Control and revoke are Praetorian-only.
CLI endpoint management
Once one or more endpoints are enrolled, the guard command provides lifecycle management without the web UI.
Launching internal hunts
Hannibal hunts that require endpoint-resident work can be started from the CLI:
guard hunt launch --internal --endpoint <endpoint-id> --scope <asset>
--internal also requires the Hannibal infrastructure agent and at least one --scope.
Status output mirrors the existing external-hunt behavior. Use the same hunt subcommands to monitor progress and retrieve results.
Endpoint approval prompts in Marcus conversations
When a Marcus conversation requires the agent to execute something on an endpoint, the CLI surfaces the server-authored approval prompt inline. Before confirming, review:
- The target endpoint
- The capability family to be invoked
- The expected internal reach of the operation
- The session lifetime
Respond at the prompt to approve or deny. The conversation proceeds only after a response is recorded.
Endpoint task status and cancellation
Endpoint tasks initiated by Marcus or by internal hunts are observable directly in the CLI:
guard agent endpoint status <conversation-id>
guard agent endpoint cancel-task <endpoint-id> <task-id>
Download artifacts from a completed operation with guard agent endpoint operation <session-id> <operation-id> --download <directory>.
Still need help? Ask the team